
This advanced field guide is written for new operators who want a clean start and for experienced hands who want tighter control, faster cycles, and fewer incidents. You will learn pre start inspections that find issues in minutes, control techniques that make first movements smooth, operating tactics that protect the jobsite, and a practical practice plan that turns skill into muscle memory. Everything is aligned with skid steer safety and real world crew expectations.
Operating principles that never change
Smooth is fast
Short, even joystick inputs prevent load spills and shorten cycle time. Most new operators try to make big moves. Skilled operators use small corrections and let hydraulics do the work.
Sightlines beat specs
A clear view to the cutting edge and forks will pay you back every minute. Clean glass and lights, adjusted mirrors, and a good rear camera outperform any brochure number during night work.
Safety is a habit
How to operate a skid steer safely starts with repeatable routines. A three minute pre trip inspection skid steer routine and a two minute post shift check do more for uptime than any single option.
Pre start checks and walkaround
Walk clockwise. Touch what you check. If you cannot see a point clearly, open the panel or remove the guard as designed. Log defects before the key turns so the shop can plan parts. This is how crews practice skid steer safety without slowing production.

Fluids filters belts and leaks
This is fast skid steer maintenance, not a full service. You are looking for outliers that ruin the shift.
- Engine oil at the mark and the cap tight. Milky oil or fuel smell means stop and report.
- Coolant at the line. Hoses free of bulges or rub marks. Look for dry white or colored crust near clamps that hints at seepage.
- Hydraulic level in range and no wet dust on hoses. A hydraulic leak skid steer alert during the shift often starts as a small mist you can see now.
- Fuel level recorded. DEF where applicable at a sane level. Cap threads clean so grit does not enter the system.
- Belts present and tracking straight. Shine on the ribs and black dust in the bay predict noise or no charge later.
- Air filter indicator reset in the green. Do not knock filters on the ground. Replace when scheduled or when restriction shows under load.
- Cooling package clear. Pick debris from screens. If the machine has a reversing fan, verify operation after start.
- Battery posts snug and free of white fuzz. Loose grounds make phantom electrical faults that waste hours.
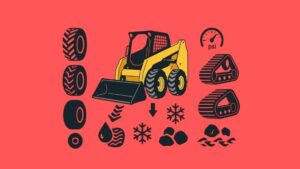
Tires or tracks and undercarriage checks
- Skid steer tires at a sensible pressure per the decal and job. Even wear across the tread, no cords showing, valve caps installed. Sidewall cuts get tagged and reported.
- Skid steer tracks at proper tension. Knock ice and packed clay from sprockets and idlers. Inspect track lugs for tears and the guide for rub marks that signal misalignment.
- Rollers and idlers move freely with no obvious wobble. Listen for squeal on the first move which usually hints at dry bearings or debris.
- Chain case or final drives checked per brand procedure. Evidence of weeping around hubs or plugs becomes a log note and a quick photo.
Attachment interface and hydraulics
- Quick attach plate flat and free of bent corners. Lock pins move fully and springs return. Test both locks before connecting the tool.
- Flat face couplers clean and capped. Coupler O rings intact. Hoses routed without pinch or rub points. If caps are missing, replace before the shift.
- Attachment hoses and cylinders wiped. Look at rod chrome for pitting that chews seals.
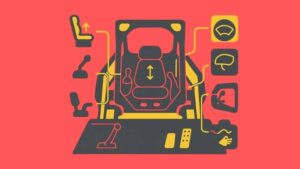
Cab access PPE and control familiarity
- PPE on. Gloves, glasses, hi vis, and hearing protection for loud attachments. No loose clothing or lanyards that can catch controls.
- Three points of contact in and out. Steps and rails clear of mud and ice.
- Seat and mirrors adjusted. Test the horn, beacon if equipped, work lights, and the backing alarm skid steer system.
- Know your skid steer controls. Confirm ISO vs H pattern before moving. If the machine allows pattern change, set it to the company standard and tag the panel.
- Interlocks tested. Lap bar, seat switch, door latch on door required models, and seat belt engaged.
| Check | Why | Pass standard |
|---|---|---|
| Fluids and leaks | Prevents run to failure | No unexplained wet spots, levels correct |
| Tires or track tension | Controls steering feel and stability | Even wear, tension per decal, no rubs |
| Couplers and quick attach | Keeps oil clean and tools secure | Caps on, pins lock, hoses intact |
| Controls and interlocks | Operator safety skid steer baseline | Pattern confirmed, warning devices work |
The entire walkaround should take three to five minutes. If it takes longer, your layout is wrong or your cleaning routine needs work.


Control basics and first movements
Modern machines use EH controls or pilot controls. The mapping may be ISO or H pattern. Master the mapping once and standardize across the fleet to reduce mistakes. The plan below assumes a typical ISO setup with a left joystick for travel and a right joystick for lift and tilt. If you run H pattern, swap the mental map to match your brand.
Starting smooth travel steering and braking
- Neutral and quiet. Feet flat, hands relaxed on the skid steer joystick, auxiliaries off. Start and let gauges stabilize. Watch for check engine or hydraulic warnings.
- Release the park brake. Ease both sticks forward equally to track straight. If the loader drifts left or right, stop and re center. Do not fight the drift with big corrections.
- Steer with differential pressure. Push one stick slightly more to arc a turn. Short taps create gentle S turns. Hold a longer input to pivot tight in a confined space.
- Stop by rolling to center. Snapping to neutral makes the frame pitch and the load shift. Smooth returns protect the payload and the operator.
- Reverse with a habit. Look over your shoulder, check mirrors or rear camera, then move. Make this sequence the same every time.
Lift and tilt functions feathering and speed control
- Lift in one motion. Ease up on the stick and watch the attachment nose. If the rear feels light, lower the load and shorten the carry distance.
- Tilt for balance. Carry loads low and rolled back. Start the forward tilt the last foot before the dump point so you do not bang stops.
- Feather compound moves. Practice lifting while tilting to keep a bucket edge level during a finish pass or to roll forks under a pallet cleanly.
- Use speed modes if available. Creep or turtle for tight work. Rabbit for open travel. Many EH controls allow response tuning to calm initial movement.
Working in tight spaces and around people
- Always assume someone is behind you. The backing alarm skid steer device warns by sound but your eyes make the decision. A rear camera earns its keep during night and winter work.
- Lines and cones define your space. Use temporary cones to reserve a swing arc near loading docks and dumpster pads.
- Set a personal speed limit in pedestrian zones. You do not get paid for rushing in tight spaces.
Relaxed hands and steady breathing make better operators. If the loader jitters, lower the load, slow your inputs, and reset your posture.
Operating techniques that protect the machine and the site
You get judged on what you leave behind. Clean edges, unbroken curbs, and undamaged turf separate pros from passersby. The techniques below come from thousands of hours on mixed sites.
Slope work stability and load center awareness
- Prefer up and down travel on slopes. If you must traverse, keep the heavy side uphill and the load very low.
- Know the load center. Fork ratings assume a typical center. Long loads place the weight forward and reduce stability at the same weight.
- Avoid sudden reversals or sharp pivots on an incline. Ease to a stop, then change direction. Momentum multiplies the tip when the boom is high.
- Use short shuttles on steep grades. Break long climbs into flat segments whenever possible.
Approach angles curb crossings and obstacles
- Approach curbs square and at a walking pace. Tilt to meet the surface gently, then climb. Do not twist frames with angled hits.
- Protect edges with mats or sacrificial boards on fragile pavers. Four minutes of prep prevents a costly callback.
- Carry low over obstacles. Lower the load until the cutting edge or fork heels are just clear. Watch both corners, not just the side you favor.

Material specific tips
- Topsoil and fines. Use a low profile bucket and back drag to knock down highs, then feather forward with a slight roll back to avoid chatter.
- Gravel. Avoid polishing by running moderate speed and keeping the bucket edge flat. Slight washboarding means you are too fast or too aggressive on tilt.
- Mulch. Carry higher than soil to avoid trail dribble. Feather tilt forward on the last 2 feet of travel so the pile releases clean.
- Pallets. Line up early, stop short, set fork height exactly, then enter level. Lift two inches before backing. No jabs or you will split deck boards.
Attachment habits that extend life
- Keep flat face couplers clean and capped. Dirt here creates contamination that ruins motors and valves.
- Relieve pressure before disconnecting. Cycle the auxiliary switch to the pressure release position if equipped. Never pry couplers with a tool.
- Check hoses for pinch points when you curl or lift fully. Tie or clamp a clean loop so it does not rub guards.
- Size the attachment to your hydraulics. A tool that wants more GPM than you have will feel weak and run hot.
Protect the site like it is your own property. It is cheaper to lay a mat than to fix a curb, and crews remember operators who leave clean lines.
| Scenario | Do | Do not | Why |
|---|---|---|---|
| Tight alley with blind corner | Use a spotter with eye contact | Back on guesswork | Prevents backing incidents |
| Fresh asphalt | Use mats and gentle turns | Pivot in place | Prevents surface shear |
| Wet clay haul | Short shuttles, carry low | High speed with raised load | Controls slides and spill risk |
| Night cleanup | Clean lights and camera first | Work with hazy glass | Maintains sightlines |
Working near people and traffic
Machines and pedestrians mix badly. Plan for people and you will never meet them by surprise. The rules below are simple and enforceable.
- Define a work zone with cones or tape. If heavy foot traffic is unavoidable, assign a spotter whose only job is eyes on your machine.
- Use a standard set of hand signals. No shouting over engines. One person directs. Everyone else stays clear.
- Stop if visual contact with the spotter is lost. Reset position before moving again. This one rule eliminates most near misses.
- Use the backing alarm skid steer system and horn to announce movement at blind corners and dock doors.
- Never lift over people or parked vehicles. If you need to pass a zone, set the load down and carry lower.
Cold weather and extreme conditions
Cold multiplies small mistakes. Oil thickens, couplers freeze, glass fogs, and the operator rushes. Build a short routine that keeps the plan intact.
Starting warmup and defrost
- Glow or pre heat exactly as the manual suggests. Two short cycles beat one long crank. A block heater or battery blanket saves the starter and keeps voltage healthy.
- Let hydraulics come alive before work. Sweep lift and tilt gently to move oil through the circuit. Cold oil and full power do not mix.
- Defrost and wipe both sides of the glass. Clean mirrors and camera lens. Visibility skid steer upgrades help only if you keep them clean.
Couplers and hoses in winter
- Keep caps on and pockets clear of ice. If a coupler will not connect, it may be trapped pressure. Use the pressure release function or warm the tool head gently. Never use open flame.
- Route hoses away from pinch points created by ice. A re positioned clamp now prevents a split line later.
Dust and heat in summer
- Blow out coolers with low pressure air from the clean side. Do not embed dust with a pressure washer. Check reversing fan behavior after the engine is warm.
- Watch for hydraulic whine during long high flow work. If the machine derates or the oil smells hot, ease off and clean the cooling pack.
Shutdown post shift and documentation
A clean close sets up the next shift and proves to the shop that you respect the asset. The habit takes under ten minutes. It turns questions into a maintenance log skid steer record that speeds decisions.
Cleaning couplers windows and lights
- Set the attachment down and relieve pressure on the auxiliary circuit. Disconnect with clean rags ready. Cap both sides immediately.
- Wipe windows, mirrors, beacons, and work lights. Night work demands clear optics. A film of salt or dust steals half your light.
- Brush debris from grills and belly pans. If the machine has a swing out cooler, open and clean the faces gently.
Greasing fuel top off and notes for next shift
- Grease per the chart. Wipe the zerk first so grit stays out. A clean gun and rag save pins and bushings.
- Fuel to policy so the next crew does not start late. Log hours so services hit on time.
- Open the maintenance log skid steer sheet or app. Write warnings, leaks, odd noises, and attachment issues. Add two quick photos if something is borderline.
| Task | Target time | Tip |
|---|---|---|
| Relieve pressure and cap | 1 minute | Prevents stuck couplers next shift |
| Clean glass and lights | 2 minutes | Reduces glare and eye strain |
| Grease and fuel | 4 minutes | Follow the chart exactly |
| Log and park | 2 minutes | Arms down, parking brake on |
Skill progression and practice plans
Operators get good with short, repeatable drills. Ten minutes a day beats a single long session. The schedule below moves a new hire from basic control to production in four weeks and gives experienced operators structure to sharpen skills. Use this for operator training skid steer onboarding and as the basis for internal certification.
Week zero familiarization
- Cab walk. Identify switches, ISO vs H pattern, park brake, auxiliary controls, detents, and display warnings. Practice pattern change if your model supports it and then lock to company standard.
- No load driving. Start, move forward, reverse, make smooth S turns. Practice stop to neutral without pitching the frame. Five minutes only.
- Attachment hookup drill. Approach square, lift to engage, curl, lock pins, connect hoses, check for leaks, cycle the tool briefly, then disconnect with proper pressure relief. Repeat until it is automatic.
Week one control smoothness
- Figure eights with cones. Walk speed only. Equal stick pressure for symmetrical arcs. Reverse the pattern after five laps.
- Edge control on gravel. Keep the bucket edge level while lifting and traveling. Back drag with a flat edge to finish a 20 foot lane without washboarding.
- Fork approach no load. Stop early, adjust height, slide fork tips level under a pallet frame, lift two inches, back straight, set down, repeat.
Week two light production
- Load and carry cycles. Ten repeats moving a measured bucket of material. Focus on identical travel height and gentle stops. Record lap times and aim for consistency, not a single fast sprint.
- Precision parking. Place a bucket corner within one inch of a chalk X three times in a row. Then do it on the opposite side to train both eyes.
- Spotter drill. Run a tight S curve with a spotter using hand signals. Stop immediately on signal loss.
Week three attachments
- Soil conditioner or power rake. Learn pass overlap and depth control. Pause at the end, lift, reverse straight, and set down without gouging.
- Broom or pusher. Follow a curb line straight with the tool flat. Practice stopping short of obstacles without leaving piles.
- Auger pilot holes. Keep vertical by referencing a parked truck or fence post. Slow rotation for clean holes. Stop if the bit polishes and reset the pilot.
Week four evaluation and certification
- Written short test on safety, pre trip, interlocks, and shutdown.
- Hands on test with a timed course. Include hook up, straight carry, corner approach, dump, back drag, and park. Score smoothness and site protection above raw time.
- Certification sign off with instructor notes and a follow up plan. Schedule a refresher in six months or after any incident.
Certification is the starting line. Re run a five minute drill at the start of long shifts. Small routines keep skills sharp when fatigue builds.
| Drill | Goal | Common mistake | Fix |
|---|---|---|---|
| Figure eights | Even arcs and steady speed | Choppy stick inputs | Relax grip and look ahead |
| Fork approach | Level entry under pallet | Entering high or tilted | Stop early and reset height |
| Back drag finish | Smooth surface without chatter | Too much down pressure | Feather tilt and lift slightly |
Fast troubleshooting in the field
Not every hiccup needs a service truck. The checklist below resolves common issues in minutes. If symptoms persist or safety is in question, stop and call the shop.
Machine will not move or lift
- Check interlocks. Lap bar down, seat switch engaged, park brake released. Some models require the door closed.
- Cycle key off for ten seconds, then restart. Watch the display for fault messages and log them.
- Verify auxiliary is off. Some models reduce travel if auxiliary is latched in detent.
Hydraulic tool is weak or dead
- Confirm the correct auxiliary direction and detent. Switch to the other direction as a test.
- Relieve trapped pressure on the attachment. Use the release function or crack a hose at the tool carefully with power off and rags ready.
- Inspect flat face couplers for damaged O rings or dirt. Clean and reconnect. A grain of grit can block flow.
- Listen for hydraulic whine. If oil is hot, idle to cool and clean the cooling pack.
Steering pulls or feels jerky
- Check tire pressures side to side or track tension. Uneven traction makes the loader drift.
- Reduce joystick gain in the settings if EH controls are too reactive. A calmer map improves accuracy.
- Inspect for packed debris under the chassis or around pedals and linkage on older models.
Visibility issues
- Clean glass and lights before you blame the lamps. Wipe the rear camera lens with a microfiber towel.
- Adjust mirrors so you see both corners and the blind zone behind. Recheck after the first bounce of the day.
If a symptom suggests heat, contamination, or electrical arcing, stop and call. Ten minutes now beats ten hours later.
FAQ
Do you need a license to operate a skid steer ?
You usually do not need a formal “driver’s license” for a skid steer, but most regions require proper training and, on commercial sites, documented operator certification or employer sign off. If you are on public roads, large job sites or working for a company, you must follow local safety laws and OSHA or equivalent rules, so it is smart to ask your employer and check your local regulations rather than assume.
What is the simplest daily checklist that still protects the machine?
Fluids, leaks, tires or track tension, couplers and quick attach, controls and interlocks, lights and backing alarm. Touch each point and write defects in the log before you move.
Which control pattern should a mixed crew learn first ISO or H?
ISO is the most common on new fleets and maps cleanly to travel on the left and lift tilt on the right. If your company standard is H pattern, lock that pattern across the fleet and train to it. Consistency reduces errors.
How low should I carry loads during travel?
Carry just high enough to clear the surface and rolled back so the center of mass stays inside the wheelbase or undercarriage. Lower is safer and steadier.
Do I need high idle to warm up in winter?
No. Moderate idle with gentle movements of lift and tilt warms the system evenly. Use block heaters or glow cycles as designed. Avoid long high idle periods that waste fuel without warming hydraulics.
When should I ask for a spotter?
Use a spotter in pedestrian zones, alleys with blind corners, near docks, and anytime your sightline is blocked by stacks or parked cars. One clear set of hand signals prevents most close calls.
What is the best way to avoid a hydraulic leak skid steer failure on a route?
Keep couplers clean and capped, relieve pressure before disconnecting, secure hose loops away from pinch points, and inspect rods for pitting. A five second wipe at each hookup avoids a five hour repair later.
How do I log a problem without slowing the crew?
Use a simple template with machine number, hours, symptom, and a photo. Two lines and a picture are enough for the shop to plan parts and decide next steps.
Can I switch between ISO and H pattern during a shift?
Avoid switching patterns mid shift. Set the company standard before work and stick to it. Pattern changes are a common source of muscle memory mistakes.
What practice drill improves the most skills in the least time?
Figure eights around cones with a loaded bucket at low travel height. It teaches smooth inputs, even arcs, braking, and load control all at once.
How much time should shutdown take on a busy night?
Eight to ten minutes. Relieve pressure and cap, wipe glass and lights, grease, fuel per policy, log hours and notes, arms down, park. If it takes longer, fix layout or tools.